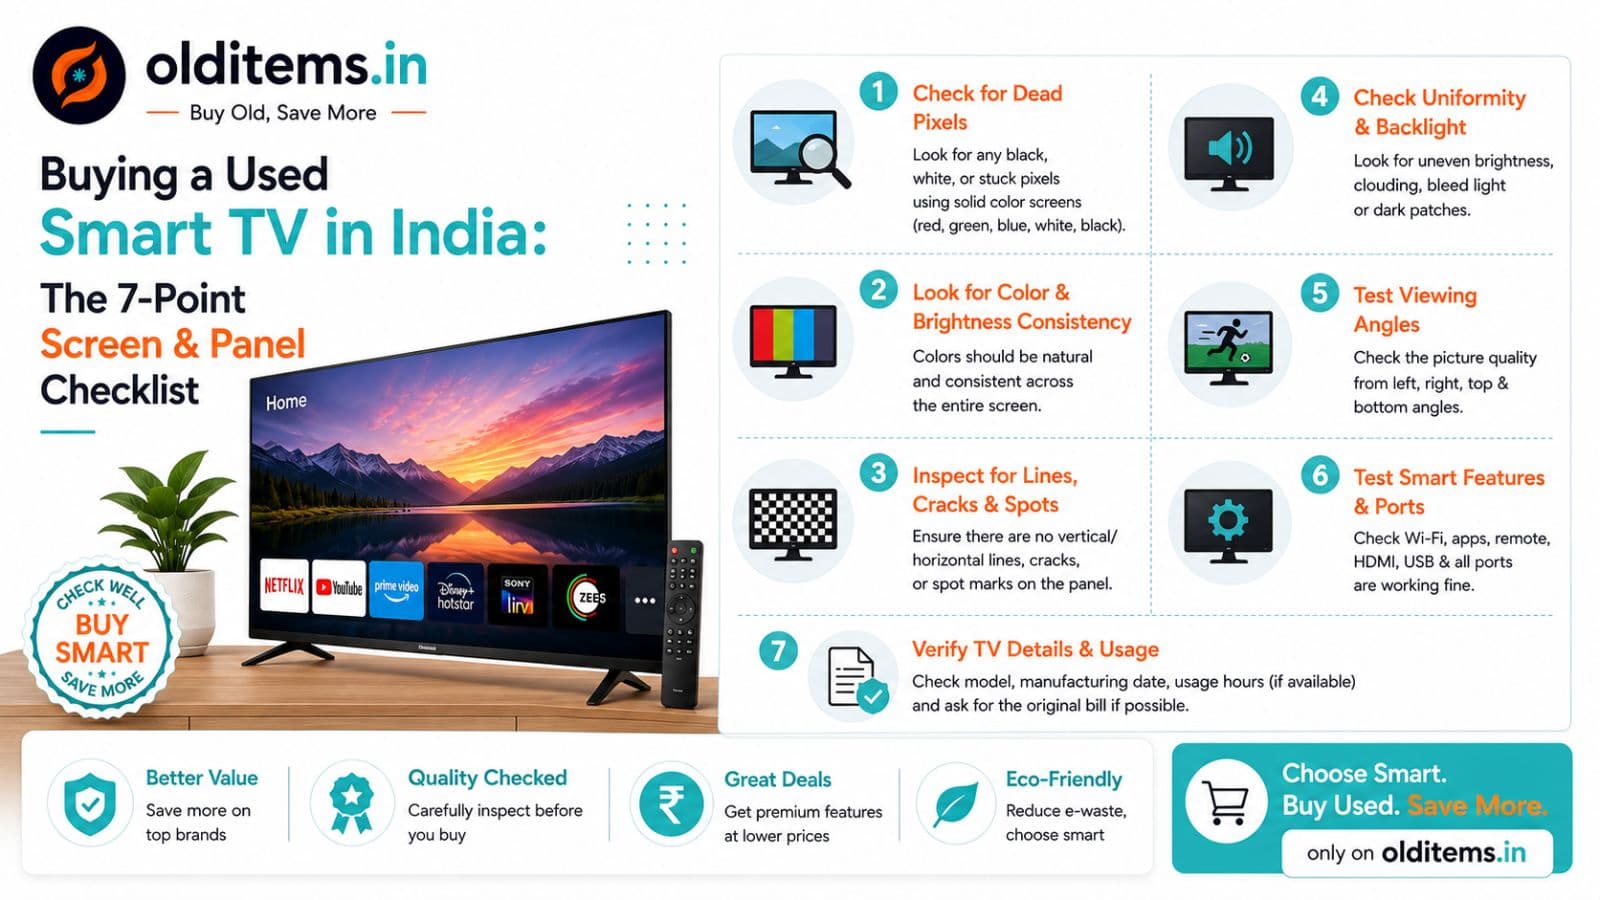
Buying a Used Smart TV in India: The 7-Point Screen & Panel Checklist
With new 4K, QLED, and OLED televisions launching every year across India, thousands of homeowners frequently upgrade their entertainment setups. This creates a massive secondary market where you can purchase high-end 43-inch, 55-inch, or 65-inch Smart TVs at 40% to 60% discounts off retail prices.
However, buying a pre-owned television comes with unique technical risks. Unlike furniture or simple home goods, modern television panels are delicate and complex. Replacing a damaged 4K panel can cost up to 80% of the TV's original price, making proper upfront inspection vital.
Before you transfer any money, use this comprehensive 7-point inspection guide and testing protocol to ensure you are getting a crystal-clear display that will last for years.
Pre-Owned TV Inspection Quick Reference Table
| Component | What to Look For | How to Test It On-Site | Pass/Fail Condition |
| Display Panel | Dead pixels, cluster burn-in | Play solid color videos (Red, Green, Blue, White) on YouTube | Pass: Zero color patches Fail: Black dots or heavy discoloration |
| Backlight | Edge bleed, cloudy white spots | Play a completely black video in a dark room | Pass: Uniform dark display Fail: Bright glowing corners or white patches |
| HDMI & Ports | Damaged connectors, blown ICs | Connect a laptop/FireStick to every single HDMI port | Pass: Video & audio work on all ports Fail: "No Signal" error on any port |
| Smart OS & Wi-Fi | RAM lag, slow streaming, crashes | Connect to mobile hotspot and stream 4K 60fps video | Pass: Smooth playback Fail: Constant buffering or app crashes |
| Power Supply | Overheating, automatic shutdown | Keep the TV running continuously for 20 minutes | Pass: Remains powered on Fail: Screen flickers or turns off automatically |
1. Test for Dead Pixels & Color Patches
A single stuck pixel is barely noticeable, but a cluster of dead pixels indicates that the display panel's driver circuit is failing.
The On-Site Test: Open the YouTube app on the TV or connect your phone/laptop. Search for "Solid Color Screen Test" and play full-screen clips of solid red, solid green, solid blue, and solid white.
What to inspect: Stand 2 feet away from the screen and scan in a grid pattern. Look closely for tiny black spots (dead pixels that don't emit light) or discolored bright patches.
2. Check for "Backlight Bleeding" and Edge Shadows
Backlight bleeding occurs when light leaks around the edges of the display frame or when internal light diffusers degrade over time.
The On-Site Test: Ask the seller to dim the room lights and play a completely black screen video.
What to inspect: Examine the outer frame edges and corners. If you notice uneven white or grayish glowing clouds bleeding into the center, the internal LED backlight strips are degraded or warped from heat.
3. Check Screen "Burn-In" (Crucial for OLEDs & QLEDs)
When news channels (with static tickers/logos) or gaming consoles run continuously for hours, static image elements can permanently "ghost" into the display pixels.
The On-Site Test: Play a solid gray or yellow background image on the screen.
What to inspect: Look across the bottom third and top corners. If faint outlines of news tickers, sports scoreboards, or app icons remain visible in the background, the screen has permanent panel burn-in.
Buyer Tip: Never buy a used OLED or high-end QLED TV without running a solid gray screen test. Burn-in damage on organic light-emitting diode panels is permanent and cannot be fixed by software updates or factory resets.
4. Test Every Single HDMI & Audio Port
It is very common for lightning surges or improper cable plugging to blow out individual HDMI ports while the rest of the TV appears to function normally.
Bring a laptop or streaming media stick (such as an Amazon FireStick) along with a USB drive containing test videos and music.
Plug your device into HDMI 1, HDMI 2, HDMI 3 (ARC/eARC) one by one.
Confirm that both high-definition video and audio transmit clearly through every port.
Crank the TV volume up to 70% to listen for speaker buzzing, distortion, or blown audio drivers.
5. Evaluate Smart OS Speed & Connectivity
Entry-level Smart TVs manufactured 3 to 4 years ago often have limited RAM (1GB or less), causing modern apps to crash frequently.
Connect the television to your phone's Wi-Fi hotspot.
Open settings, check for system software updates, and launch heavy apps like Netflix, Prime Video, or YouTube.
Navigate through settings menus quickly—if switching between apps takes more than 5–10 seconds or freezes the screen, budget an extra ₹2,000 to buy an external streaming media stick.
6. Verify Physical Mounts, Table Stands, and Remotes
Confirm that the physical hardware matches your intended installation setup:
Table Legs/Stands: If you plan to place the TV on a cabinet, verify that the seller has the original desktop base legs and mounting screws.
Wall Mount Bracket: If the TV is currently wall-mounted, clarify if the heavy-duty wall bracket and mounting bolts are included in the price.
Original Remote: Ensure the smart remote (especially voice-search or air-mouse remotes) pairs correctly with the TV.
7. Run the 20-Minute Thermal Power Test
Failing power supply boards or aging internal capacitors often work fine initially when cold, but shut off once internal temperatures rise after 15 minutes of operation.
Golden Rule of TV Handovers: Keep the television running continuously while you inspect the ports, test the audio, and check display colors. If the screen flickers, dims suddenly, or restarts on its own within 15 to 20 minutes of continuous operation, do not purchase it.
Ready to buy or sell a pre-owned Smart TV in your city?
Browse verified local listings or list your upgraded TV for free today on Olditems.in!
Comments
Leave a comment
Your email is never published. Comments appear after moderation.